Instruction for preparing digital image of thumb print
Taking a thumb-print
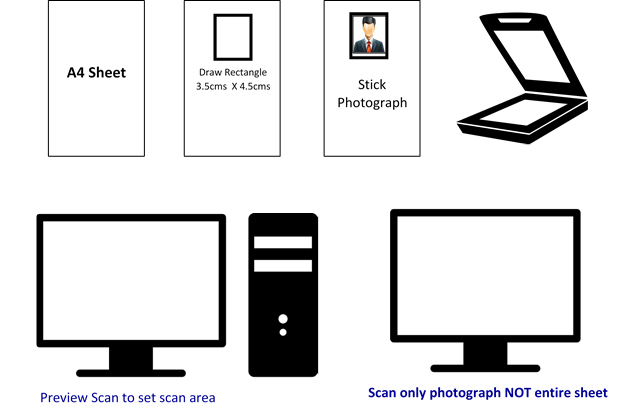
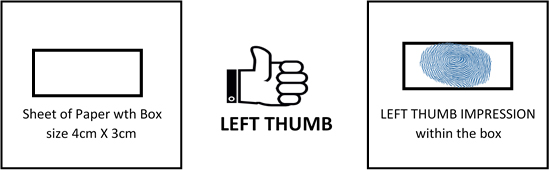
1. Draw a box of 4 cm x 3 cm (width x height) on a white sheet of paper (you may draw more than 1 box to take multiple thumb print and select the best).
2. Use a fresh blue/black colour ink pad.
3. Clean your hands and dry them before you begin (oil/dirt can obscure the prints)
4. Gently press your left thumb against the ink pad and take a horizontal print of your left thumb within the box. Do not press too much or wriggle as it may lead to smudging of print. Preferably take impressions of thumb in more than box.
5. Choose the thumb print that clearly shows the lines of your entire thumb.
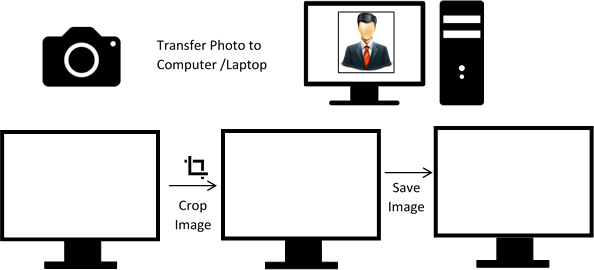
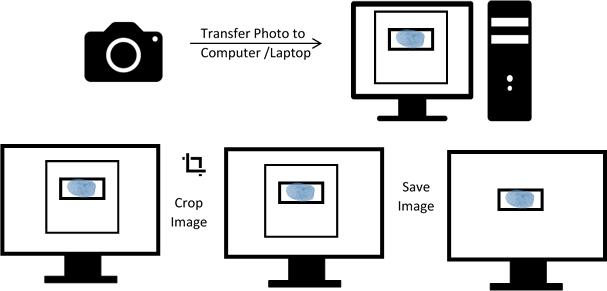
Preparing digital image of thumb-print using a digital device (camera/smart phone etc)
- Clicking image of thumb-print using a digital device.
- Click the image in bright light conditions using any digital device (preferably with > 5 megapixel resolution). Avoid using flash.
- Check the shadow of your hands/camera/smartphone etc. does not fall on the sheet.
- Click the image and check that it is not blurred due to low light conditions or shaking of hands.
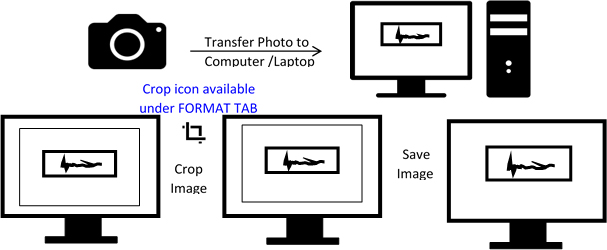
- Editing digital image of the signature
- Transfer the digital image to a computer/laptop.
- If required, use auto-correct feature of image editing software so that the signature is clear against a white background.
- Crop the image such that borders of box are reached.
- Resize the image to 20 – 100 Kb (maintain aspect ratio, i.e. height and width ratio to avoid distortion of image)
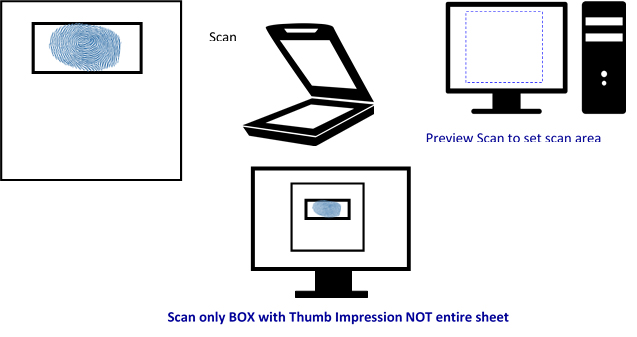
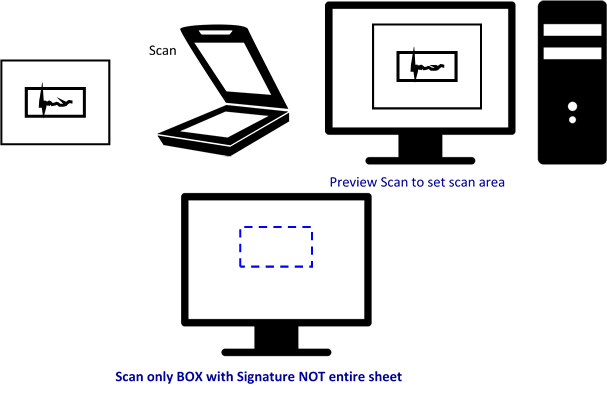
Preparing digital image of thumb-print using a scanner
- Set the scanner to 200 dpi and scan only the box with signature (DO NOT scan the whole sheet)
- Save the scanned image of thumb-print as .jpg/.jpeg/.gif/.png image.
- Re-size the image to 20 to 100 Kb. Size of the image can be checked by right click on the image and then go to “Properties” link. (Click here to know how to resize a scanned image)
Checklist before uploading digital image of thumb-print
- Thumb-print and lines are clearly visible against white background
- Image size is between 20 to 100 Kb
- Image is in .jpg/.jpeg/.gif/.png format.
- Image is not blurred in the process of editing.
Common Reason for rejection of Left Thumb Impression
- Background is not white.
- Image is blurred.
- Whole sheet is scanned such that the Thumb Print is occupying only a small portion of the frame.